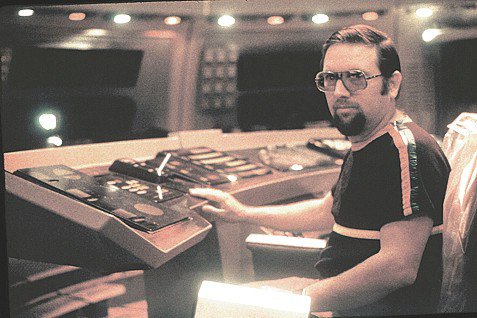
Part two.. The 2nd Season
 The classic Star Trek phaser came in a variety of colors and flavors. Four of these models stand out for our study. We have examined the first model, the black and white in the Dec/Jan article and we will now look at the second and third model of phasers.
 The classic Star Trek was a work in progress and went through many changes as it ran. For me, these changes are some of the endearing things about the early show. I ended up watching the classic episodes again and again to check out how it grew right before my very eyes. Most of the weapons and equipment went thought this kind of change and growth. For this second article we will start with the weapon seen, the black/very dark gray handle phaser one, with blue/gray pistol body.

A little time line detailing is needed here. The black and white phaser did show up for the first eight episodes then disappeared forever. From the very first look, of the black and white pistol phaser all the eye sees is a nondescript gun-like thing. There is the white handle, the black upper body and the silver barrel with the clear tip. It did not look very good on the show and was a little “out-of-place” for there was so much color everywhere else, bright color, gold shirts, blue shirts, red guard rails, etc.
 Which is why I believe they disappeared only after eight shows to be replaced with two more “colorful” paint schemas… A true black handle with matching black Phaser one in a bright blue main pistol body for the long shots and subdued very dark gray handle with matching phaser one with a medium blue-gray main pistol body for the inserts or close-ups.

As with the black and white models almost all of the rest of the detailing changed from phaser to phaser.

And again the second semi-constant parts I have seen have been the muzzle and the knob-like thing on the side of the main body. Even then, I have counted three distinct models for both the muzzle and the knob.
Let us study this model from “head to toe,” starting at what some would call the “business end,” at the front of the phaser, right at the tip of the emitter. These remained the same, just carried over to the new model. The best of these tips appear to be machined acrylic, cut into a cone shape and tapering to a blunt end with the crudest of these being simply a piece of plastic tubing.
 A few of the working models were hollow or drilled out and with a taper cut. These had a grain-o’-wheat light bulb installed for a lighting effect. These lights were believed to have been installed to aid the special effects artist who would then key in on these lights when they drew the animated beam of a phaser firing.
Current custom is to leave all lights out of props. The phaser in “Star Trek – The Search For Spock” had no tip light. After all, animation is charged by the frame and an actor firing for three seconds is cheaper than a ten second blast and he might be aiming it wrong when he does fire.

Next, is the machined aluminum muzzle, again this carried over to this new model too. So, traveling back along the tapering tip, we come to a flat section at right angles to the tip. This is a recessed cut into the face of the muzzle about 1/8″ deep and it is 3/4″ flat wide section with the clear tip bored right into the center.

Swinging around up from this recess, we then find there are several levels of rings that look like steps.  The center one is the largest and widest ring or step of seven steps. This center ring has sections that are divided by a mix of flat plane sections and those that have about six to seven fine lines cut into them. It runs a flat section, then a section with lines followed by a flat section, alternating these areas all round this part of the barrel.
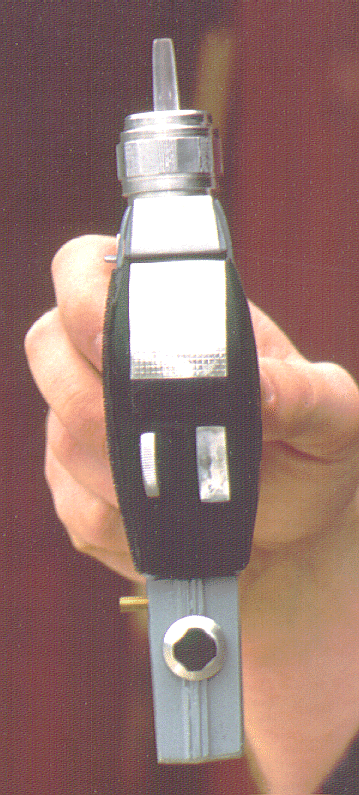 Right below the top cap and to the rear of the muzzle on the left side (just to be sure we all are talking about the “same left side”, left and right is determined by holding a weapon in your hand (either hand is OK), muzzle of the gun pointed away from you, then the side that is on your left is the left side and the side that is on your right is the right side) is a detail that looks like a knob in/on the left side of the main body. This has become known as the dilithium cap although there is no evidence that it was ever called that on the show.
I have couple of shots that show , the side cap was simply a flat section cut off a round aluminum rod that had several cuts crossing the face, leaving a small thin section across the front forming a small bar that looks like a knob. This also appears to have simply been glued on. Other models would have a more complex three part knob that were made and placed within a hole drilled into the side of the body. There are three styles of these little details. The first one I told you about in the last paragraph, the other two are nearly identical. They are made up of three parts. The first is center which was a cut off section from a round aluminum rod (again) with a V cut into one end that had a small hand made bar shaped to make the center knob that sat into the V cut. There were two styles of this model, one with thin wall tubing and one with a thicker tubing.
I believe it was Franz Joseph who called this part the dilithium crystal cap in his book “The Star Trek Technical Manual”. On some of the “hero” models this knob was hooked to a five position switch and it would snap loudly into each of the five settings. On the dummies most of them were just glued in.

Just above this knob were three ribs that are raised on the side of the body. These were the same color as the main body. Below this knob we see the trigger. This part was many shapes, sizes and placed in several angles. One constant was that all were aluminum.
Inside the working models the propmakers made their own home-grown switch with the aluminum button fastened to a brass bar to give it the spring back ability which, when pressed back, would made contact with another brass bar that made the electrical connection to light the tip bulb. (I would have bought a pushbutton at the store. Possible there were few switches small to enough to fit back then, I don’t know.) The trigger is mounted in a small housing that seems to have been tacked onto the main body to both hold the trigger and to allow mounting the handle to the main body. Below this section is indeed the handle.
 Sadly, this effort and cleverness was not carried through to the system to make these handles removable. They settled on using a plain simple old two prong twist locking electrical extension cord plug and socket. This was so “household” and everyday familiar that I am sure it is why we never see anyone unlock and change the power pack. (Having tried to make this feature, I understand how hard this simple trick is, here is nothing I could find that would work either.)
 While we are talking about these special features let’s go over them. The working features of the pistol body were: the rotating ring (discussed in the beginning of this article). Then there was a twist knob on the side of the pistol body with the five settings. Of course, there was a working trigger which operated the tip light and the feature that moved the tip in and out.
 What happened was that as the phaser one is loaded into the pistol body, the front of the phaser engages a pocket that it has to push forward. This socket connects to the tip so that when the socket is pushed forward, the tip telescopes out of the muzzle. When the phaser one is removed, this action would, of course, retract the tip. As a point of interest to nitpickers and fans of bloopers, there are a couple of scenes where you can see were this part failed to engage or failed to hold and the tip pocket has slipped under the phaser one and the tip has withdrawn into the muzzle. Check for this in a scene from “The Conscience of the King” and other episodes.
 Next moving rearward and up behind the phaser one but still on the left side of the main pistol body, we come to the little brass rod that sticks out from the side. When I first watched the shows, I remembered Captain Kirk telling the crew to lock the phasers on stun. I believed that was what this button was for, to lock the setting knob into place. I was wrong.
 In the real world, it was the lock release for the removable phaser one. The others simply had the cast phaser one glued into the pistol body and dummy brass rods which were inoperative.
 The next stop is up on top at the rear we find the pistol setting knob. On the these later models they found a great little knob with markings and numbers. It had a aluminum cone shaped ring with the numbers and, with a little cutting and work, a small knob to twist it with. These came off radio gear ten turn knobs and so costly, so a few were replaced with simple machined copies.

 The final detail to describe is the rear radiator section. On the back ground far shot models there was a little detailing most that consisted of cutting six lines into the side, back and around to the other side. Then painted them silver.
On the “heros” used for the inserts and close-ups there was a hand made radiator made up of four and only four aluminum plates sandwiched with three smoked plastic plates for spacers.

In these newer models there were two paint colors, pure black and a very dark blue blackish gray color used on these handles. There does seem to be a reason for painting the handle a color not the same as the pistol body, because later in the series they do show these handles as detachable power packs and some of the hero models had real removable handles so they had planned to show this feature as needed. And it did fit into the plot of the story of episode #52 “The Omega Glory”. Watch for Mr. Spock showing Cpt. Kirk depleted power packs. The handle on the working models were real power packs as they actually put the batteries for the functional tip light in these handles.

There were two styles and four color schemes for these handles. The two styles were the first and second season model which are the same but for the color and a third season version that was shaped differently.

Here is a list of the color combos seen in the classic shows. First, was the black and whites then the black and blue/grays, then the dark grays and gray models and then a gray, gray and black models and lastly, a black, gray and black. This is based on the many colors the phasers were painted. It’s the handle, then the main body, and finally, the phaser one. To use one as an example, the sequence is: a dark gray handle then a gray main body then a dark gray phaser one.

For now, allow me to describe these new handles, which were the same as the black and white models other than color. These handles were basically a flattened oval in shape, round ends with a flat center section. The flat center section had two side plates side by side the length of the handle, stopping just about 3/8″ short of the bottom. On the working hero models, this end 3/8s were where the end cap was and it was removable to change the batteries.

This end cap was a bit overdone for there was a small cover held on by two small screws. When this cover was removed, underneath was a nut that they had cut a slot in for a blade screwdriver to turn to loosen. (I guess a socket wrench would not fit) When loosened, this nut would remain trapped within the cap but would allow the end cap to be removed to allow the removal and changing of the batteries. Trapping this nut was done by having a hole too small for the nut to fall out of but big enough for the screw driver to reach through.